nicolasrivera
Senior Member
- Joined
- Dec 3, 2008
- Messages
- 19,608
- Reaction score
- 10,972
Here it is the agin knob tutorial for all of you to try.
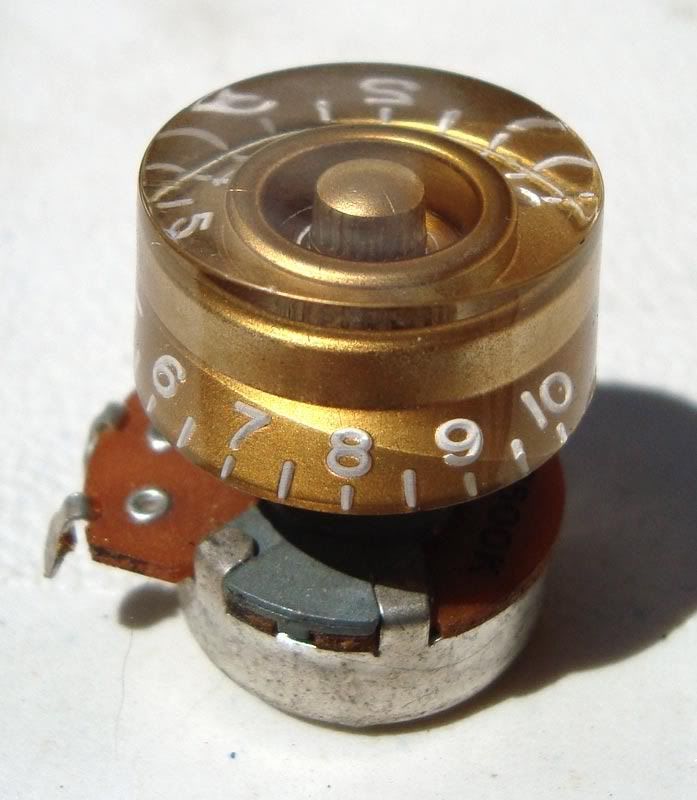
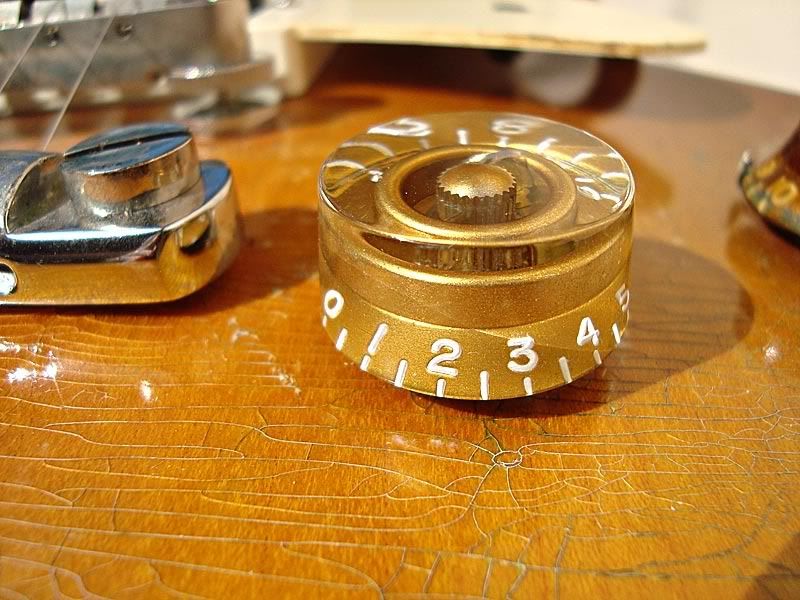
This is the new knob, it is a speed knob, i'm out of new bell knobs.
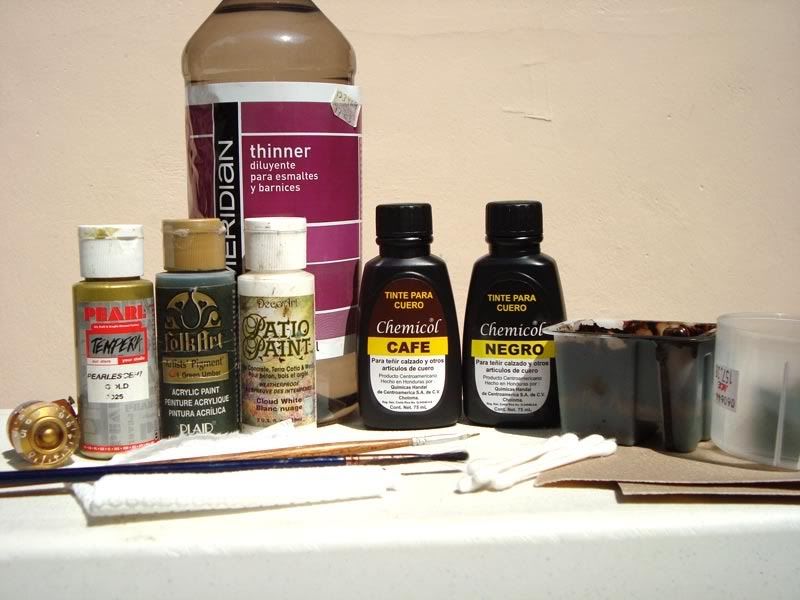
This are the ingredients:
I use 3 acrylic paints, a gold colored similar to the knobs gold tone, white and a deep green color. Paint thinner is a very important ingredient, brown and black leather dyes, one or 2 fine brushes, some Qtips and some plastic cups.
I like to soften the hard edges of the knobs a little with sand paper 320 grit first, then 600 and then 1500 grit, juts to imitate the ware your fingers will do to them over time:
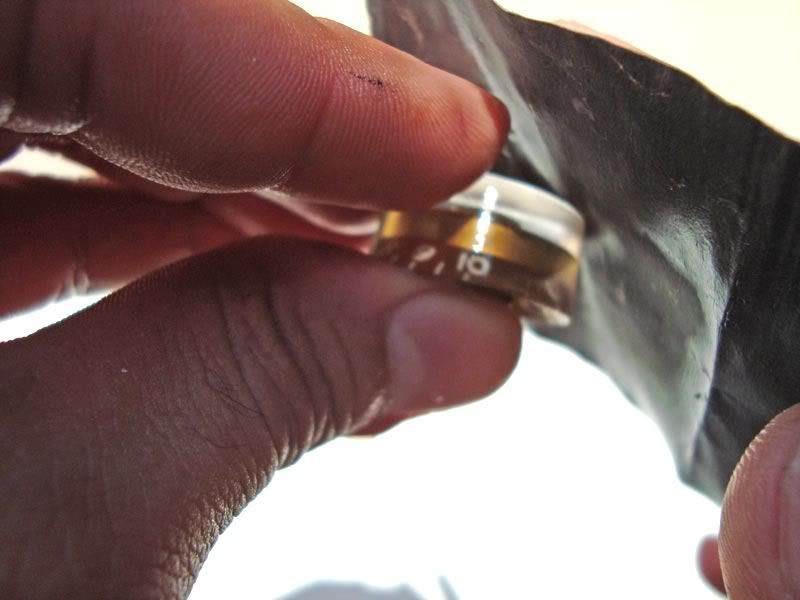
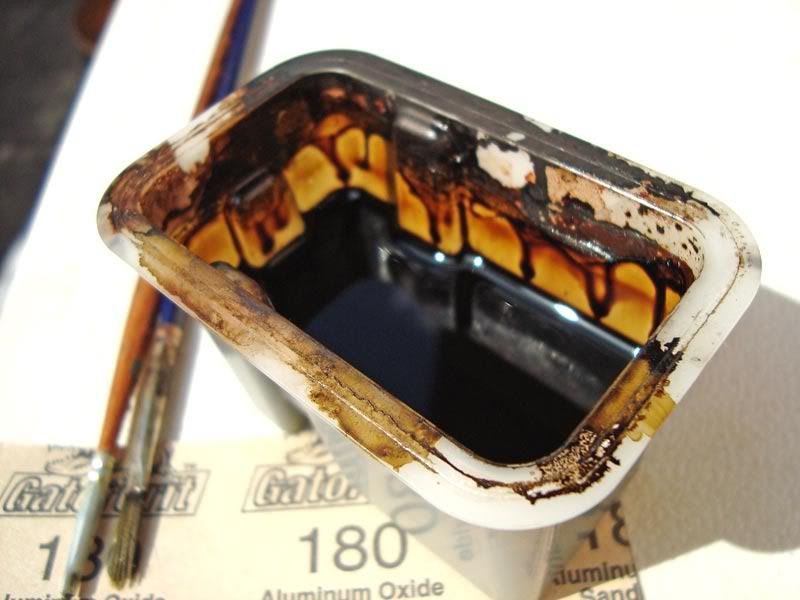
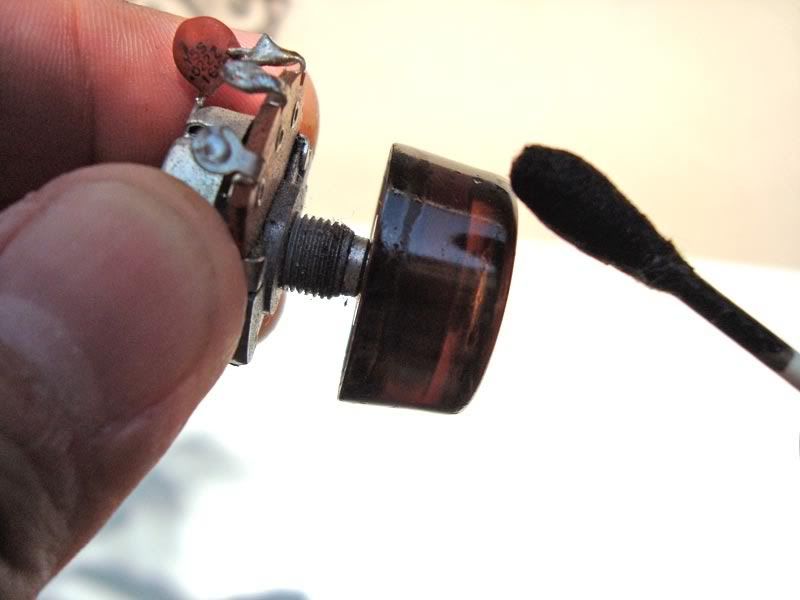
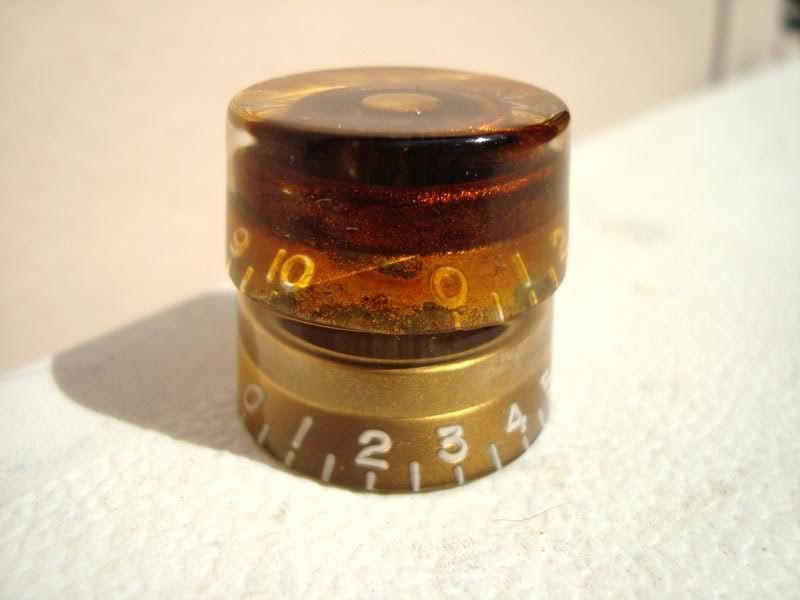
Do a 70% brown-30%black mix in a plastic cup and then use a tip to apply it to the knob let it set for 5 minutes and them use another tip with thinner to take off the dye, this will take most of but some will be impregnated into the plastic given it an very light amber tone.
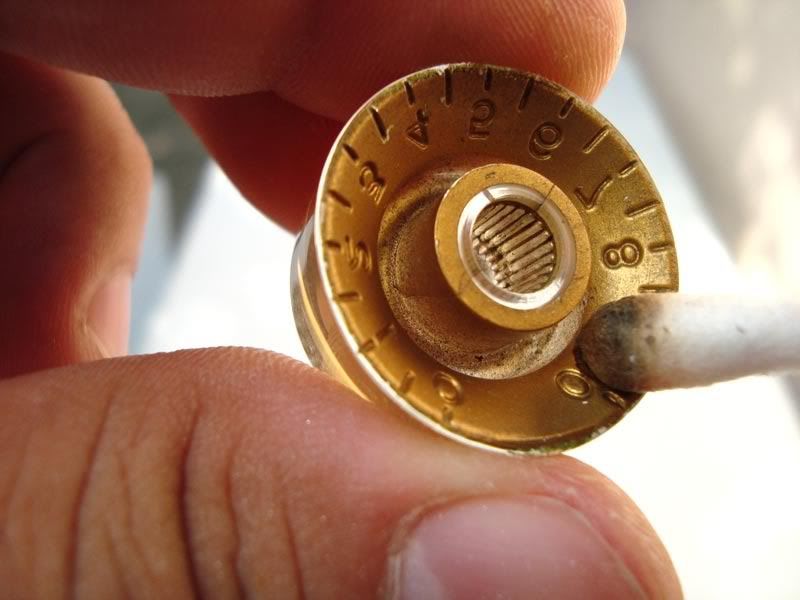
Now we need to loosen a little the gold interior paint but be careful not to remove it, to do this just use another tip with thinner and apply it directly to the gold paint in a very light manner, don hurry this and just let it work, use the sun to see thru the paint, you will see how it is loosen, do this to your own liking:
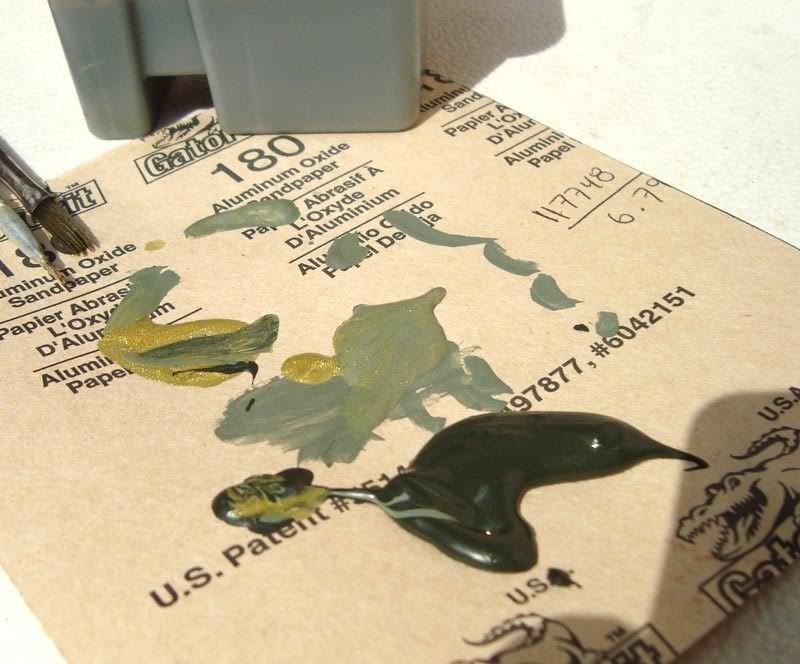
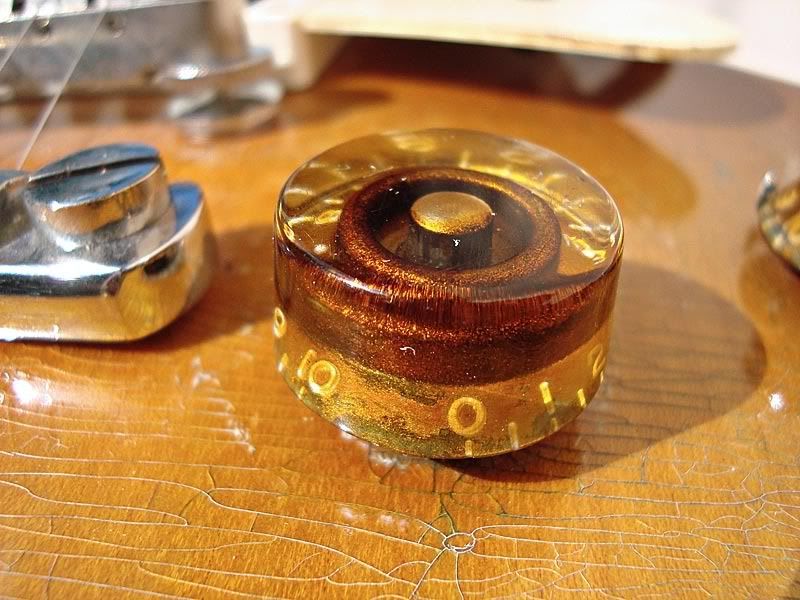
The next step and final one is to paint the inside of the know to give it the amber/green aged look. To make the gold paint look a little darker or amber use the leather dye mix and put in 50% of thinner in to the cup, use the fine brush and paint you way inside the knob. After that put the green, white and gold paint on top of a piece of paper and mix green with white to make a lighter green:
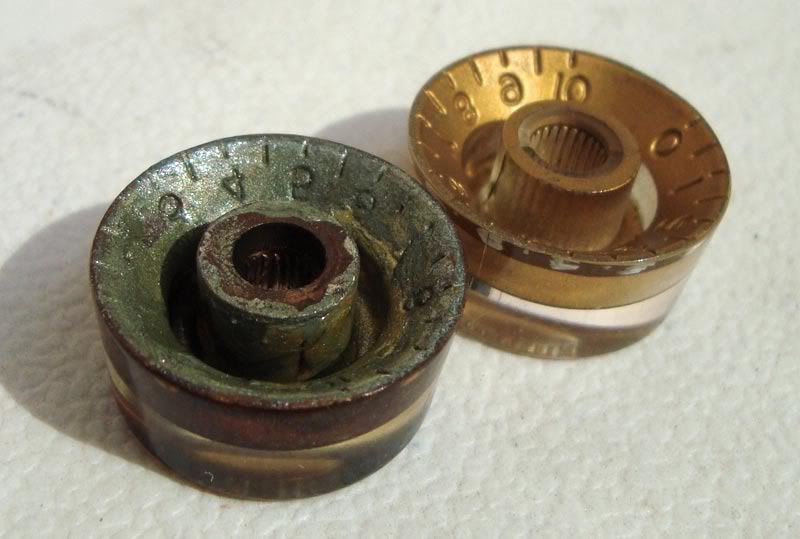
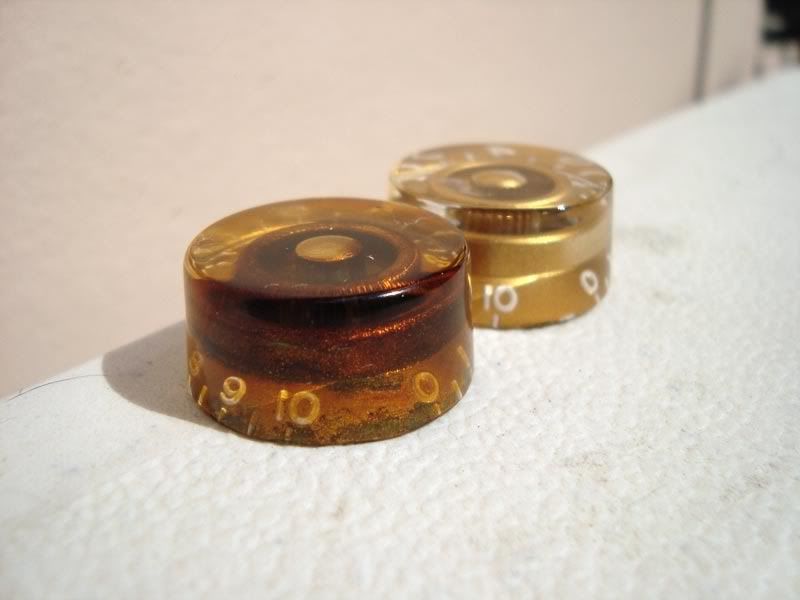
This is how the interior looks with the "knew paint":
This is the new knob, it is a speed knob, i'm out of new bell knobs.
This are the ingredients:
I use 3 acrylic paints, a gold colored similar to the knobs gold tone, white and a deep green color. Paint thinner is a very important ingredient, brown and black leather dyes, one or 2 fine brushes, some Qtips and some plastic cups.
I like to soften the hard edges of the knobs a little with sand paper 320 grit first, then 600 and then 1500 grit, juts to imitate the ware your fingers will do to them over time:
Do a 70% brown-30%black mix in a plastic cup and then use a tip to apply it to the knob let it set for 5 minutes and them use another tip with thinner to take off the dye, this will take most of but some will be impregnated into the plastic given it an very light amber tone.
Now we need to loosen a little the gold interior paint but be careful not to remove it, to do this just use another tip with thinner and apply it directly to the gold paint in a very light manner, don hurry this and just let it work, use the sun to see thru the paint, you will see how it is loosen, do this to your own liking:
The next step and final one is to paint the inside of the know to give it the amber/green aged look. To make the gold paint look a little darker or amber use the leather dye mix and put in 50% of thinner in to the cup, use the fine brush and paint you way inside the knob. After that put the green, white and gold paint on top of a piece of paper and mix green with white to make a lighter green:
This is how the interior looks with the "knew paint":
 It does look cool though.