You are using an out of date browser. It may not display this or other websites correctly.
You should upgrade or use an alternative browser.
You should upgrade or use an alternative browser.
I found a new project.
- Thread starter Bigneil
- Start date
This site may earn a commission from merchant affiliate links like Ebay, Amazon, and others.

icantbuyafender
Senior Member
- Joined
- Apr 22, 2011
- Messages
- 4,063
- Reaction score
- 1,935
I went gibson minis on my 56 GT
Love it
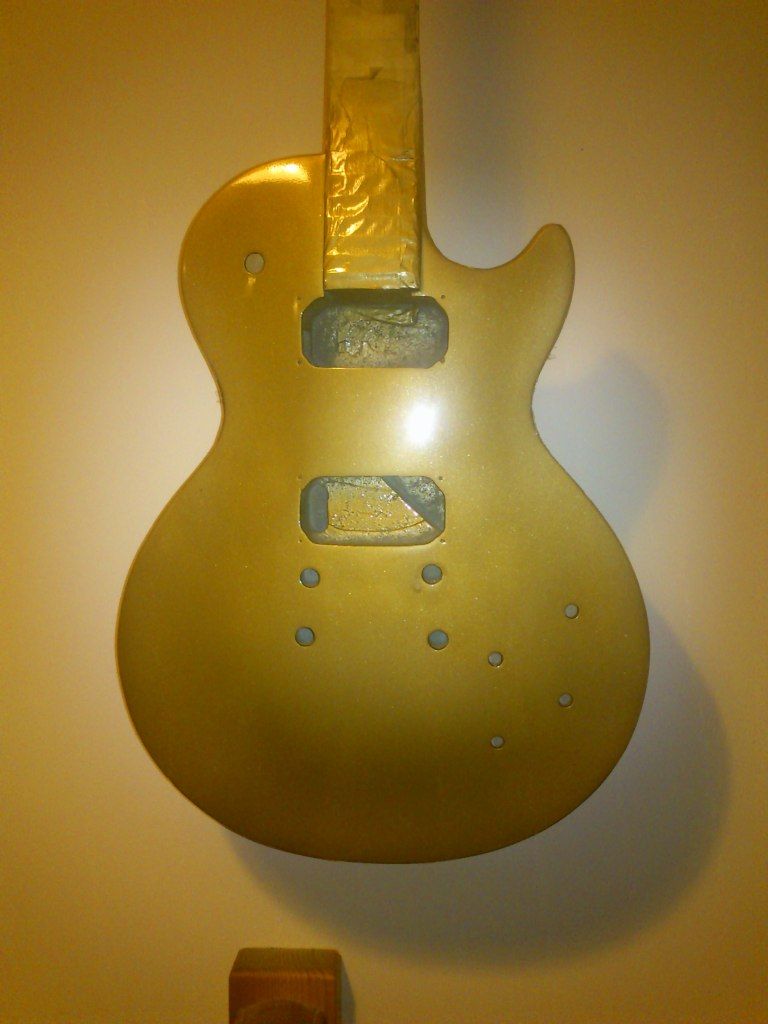
But I'd got 57 buckers with them gaping holes
Love it
But I'd got 57 buckers with them gaping holes
jamdogg
Senior Member
- Joined
- Sep 15, 2012
- Messages
- 1,049
- Reaction score
- 498
P.S it looks like the pickup routs were done by a chimp with a chainsaw.
you are too kind.

Bigneil
Senior Member
- Joined
- Mar 8, 2011
- Messages
- 696
- Reaction score
- 614
just a quick update.
2 thin coats of primer added and rubbed down with 1000 grit sandpaper <no pics needed, looked liked it did to start with>.
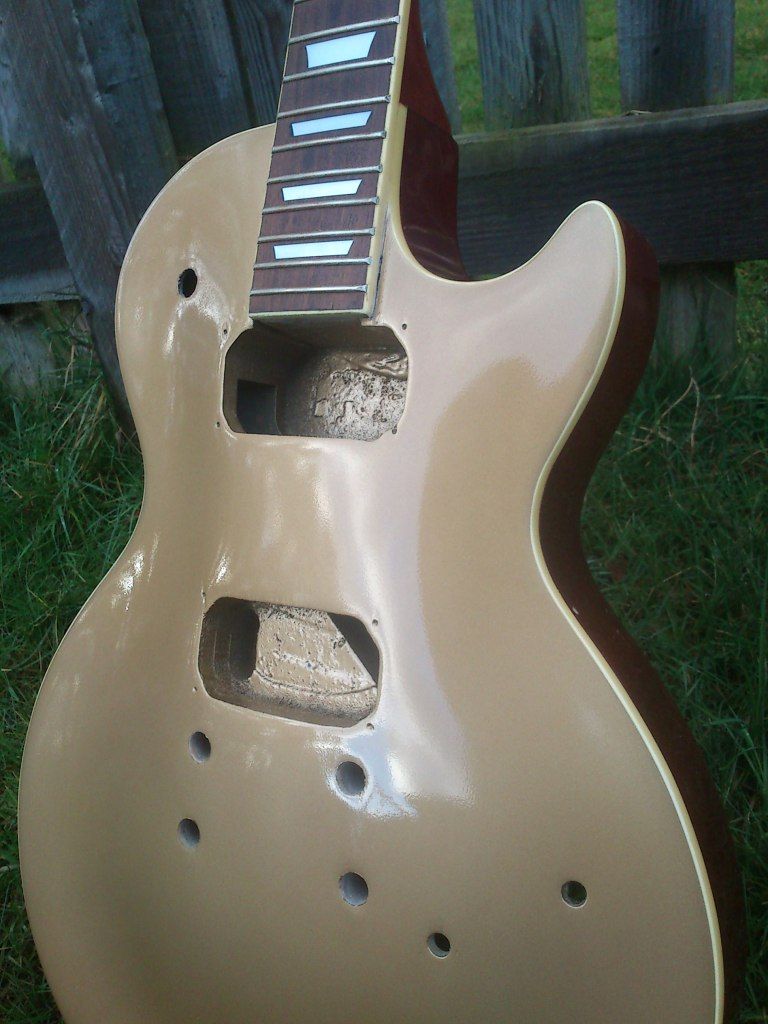
next was 4 thin coats of gold paint, I just used a spray can of auto body touch up paint. once the gold dries out it I will rub it all down again, this time with 1200 grit paper and water, and also gently scrape a little edge off the top to expose the cream binding.


Next job will be 3 coats of clear lacquer .. also just a spray can from the same shop.
P.S I am sorry about the poor quality pics, I just couldn't get decent light inside or out and it was terrible with a flash .... Ironically my phone camera seemed to take the better shots....either that or i should wait for the sun to come back....its really dark here this time of year.
2 thin coats of primer added and rubbed down with 1000 grit sandpaper <no pics needed, looked liked it did to start with>.
next was 4 thin coats of gold paint, I just used a spray can of auto body touch up paint. once the gold dries out it I will rub it all down again, this time with 1200 grit paper and water, and also gently scrape a little edge off the top to expose the cream binding.
Next job will be 3 coats of clear lacquer .. also just a spray can from the same shop.
P.S I am sorry about the poor quality pics, I just couldn't get decent light inside or out and it was terrible with a flash .... Ironically my phone camera seemed to take the better shots....either that or i should wait for the sun to come back....its really dark here this time of year.

Bigneil
Senior Member
- Joined
- Mar 8, 2011
- Messages
- 696
- Reaction score
- 614
Excellent job my friend!
Paint job is looking great. Personally, I think the pics are pretty good.
Have you decided on the pickups and a wiring scheme yet?
Keep up the good work,
Papa
Thanks Willy, I have decided to get some tonerider alnico ii classics and wire it up 50's dependant audio taper for volume and linear for tone using .22uf orange drops.
Papa
Senior Member
- Joined
- Jun 1, 2009
- Messages
- 768
- Reaction score
- 979
Thanks Willy,.... and wire it up 50's dependent audio taper for volume and linear for tone using .22uf orange drops.
Neil,
If you get a chance give this a read/listen:
http://www.mylespaul.com/forums/tonefreaks/225271-volume-pot-taper-count-ups.html
Willy
Edit: OOPS...I forgot...you already did.
- Joined
- Apr 17, 2011
- Messages
- 5,303
- Reaction score
- 5,346
Thanks Willy, I have decided to get some tonerider alnico ii classics and wire it up 50's dependant audio taper for volume and linear for tone using .22uf orange drops.
That's a great choice for P/U's and Tonerider makes good ones.
Bigneil
Senior Member
- Joined
- Mar 8, 2011
- Messages
- 696
- Reaction score
- 614
another quick update.
I have gently sanded the edges to expose a little bead of cream binding round the top edge, then the gold paint was wet sanded smooth with 1200 grit,l then 2000 grit sand paper.
next came the clear Lacquer.... I followed the directions on the spray can to hold the can 10cm away, but it didn't work nice, and I ended up with horrid big runs -
this was a bit of a set back so the next day I took the the 320 grit and sanded the whole lot back until the primer was starting to show again then smoothed it off and re-sprayed the gold retracing my previous steps back to the point of getting ready to spay the lacquer.....OH well, we live and learn.
so yesterday I had another go at the lacquer this time holding the spray can further back (25 cm same as the spray paint). Phew! it worked out much better this time, so off came all the masking tape and here is a couple of pics.
the colour looks so different when photographed in different lighting situations.


Note how the Lacquer has a lumpy bumpy finish.
I understand that this is normal, so the next step will be to wet sand it with 1200 then 2000 to get the Lacquer nice and smooth.
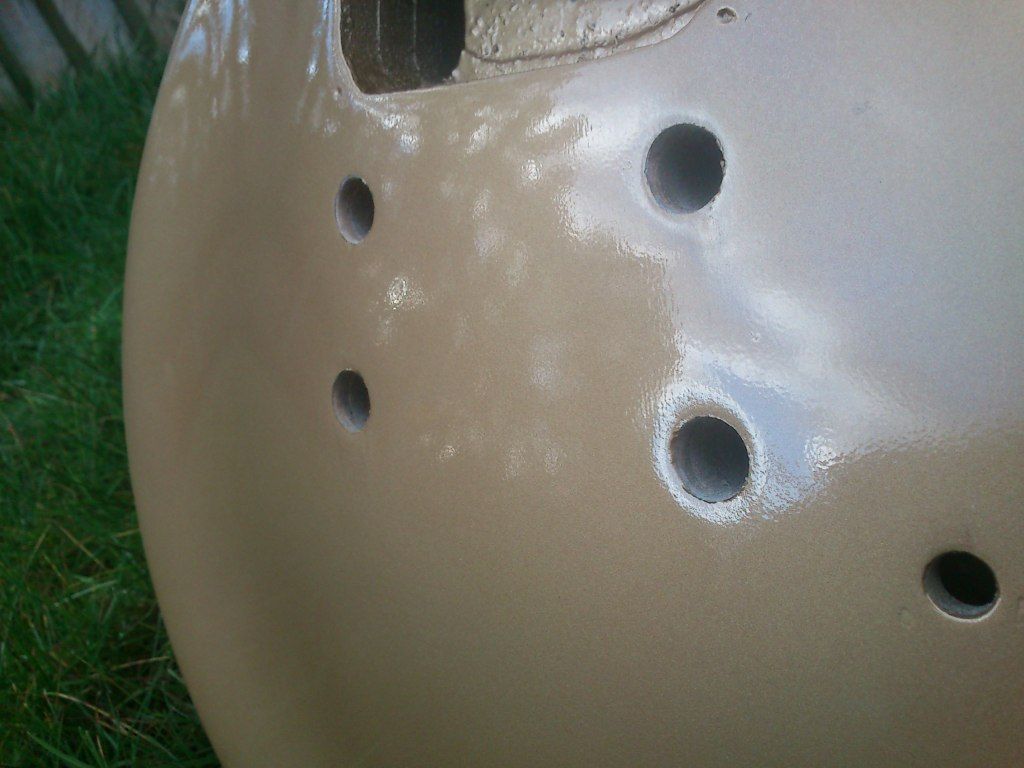
I have gently sanded the edges to expose a little bead of cream binding round the top edge, then the gold paint was wet sanded smooth with 1200 grit,l then 2000 grit sand paper.
next came the clear Lacquer.... I followed the directions on the spray can to hold the can 10cm away, but it didn't work nice, and I ended up with horrid big runs -
this was a bit of a set back so the next day I took the the 320 grit and sanded the whole lot back until the primer was starting to show again then smoothed it off and re-sprayed the gold retracing my previous steps back to the point of getting ready to spay the lacquer.....OH well, we live and learn.
so yesterday I had another go at the lacquer this time holding the spray can further back (25 cm same as the spray paint). Phew! it worked out much better this time, so off came all the masking tape and here is a couple of pics.
the colour looks so different when photographed in different lighting situations.
Note how the Lacquer has a lumpy bumpy finish.
I understand that this is normal, so the next step will be to wet sand it with 1200 then 2000 to get the Lacquer nice and smooth.
Papa
Senior Member
- Joined
- Jun 1, 2009
- Messages
- 768
- Reaction score
- 979
Hey Big Guy!!
Nice update.
Sorry to hear about the set back but, you look to be on your way again.
I did have to chuckle a bit as it reminded me of my own mistakes.
If I had a dollar for every mistake I've made...
We'd All Be Rich!!!
Keep the updates coming,
Willy
Nice update.
Sorry to hear about the set back but, you look to be on your way again.
I did have to chuckle a bit as it reminded me of my own mistakes.
If I had a dollar for every mistake I've made...
We'd All Be Rich!!!
Keep the updates coming,
Willy
Bigneil
Senior Member
- Joined
- Mar 8, 2011
- Messages
- 696
- Reaction score
- 614
Coming along nicely.
wet sanded the top with 1200 grit. Then I pulled off the tuners, the nut and TRC and wet sanded the whole guitar with 2000 grit. Next I popped off down to the shop where I got the paint and bought a mushroom shaped polishing pad and some gunge.

It is sort of a polishing paste but in stead of needing several different grades this one starts gritty, and the grit shrinks as you work it getting finer and finer and the idea is you stop once you have reached the desired level of shine.
so I gave the top a whirl until it was looking pretty shiny, did the back and sides to a satin/shiny finish, and left the neck and headstock matt/satin finish for a smooth feel when playing.
I finally started popping some of the parts I have collected together on just to see how it all looks.
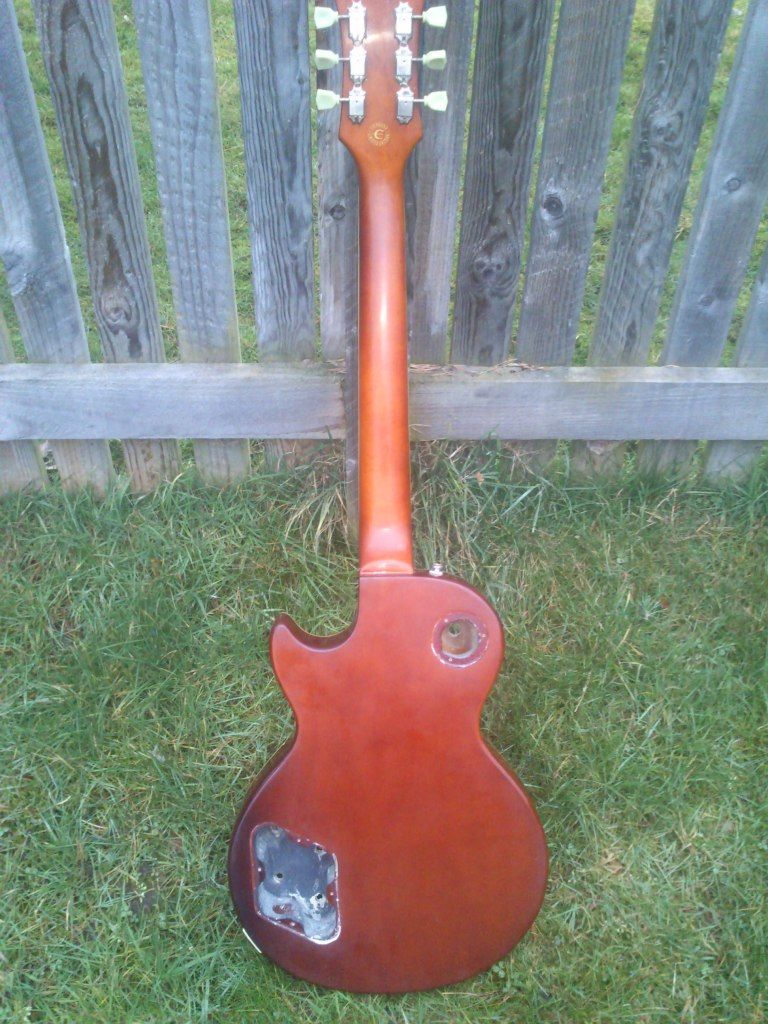
my top is not perfect though,(I made another mistake). I had several different grades of sandpaper all out at once, and accidentally picked up a heavier grit when wet sanding the top, I thought I had fixed it with the finer grade but when you see it in the right light there are some marks and scratches visible...However, this is not a disaster, after seeing it with some parts on, the screws a little gnarled and the poker chip is scratched and the writing is starting to fade, as is the truss rod cover, also the machine heads are naturally aged and there are cracks in the original clear coat over the binding, so I think I might go for a mildly "distressed look".
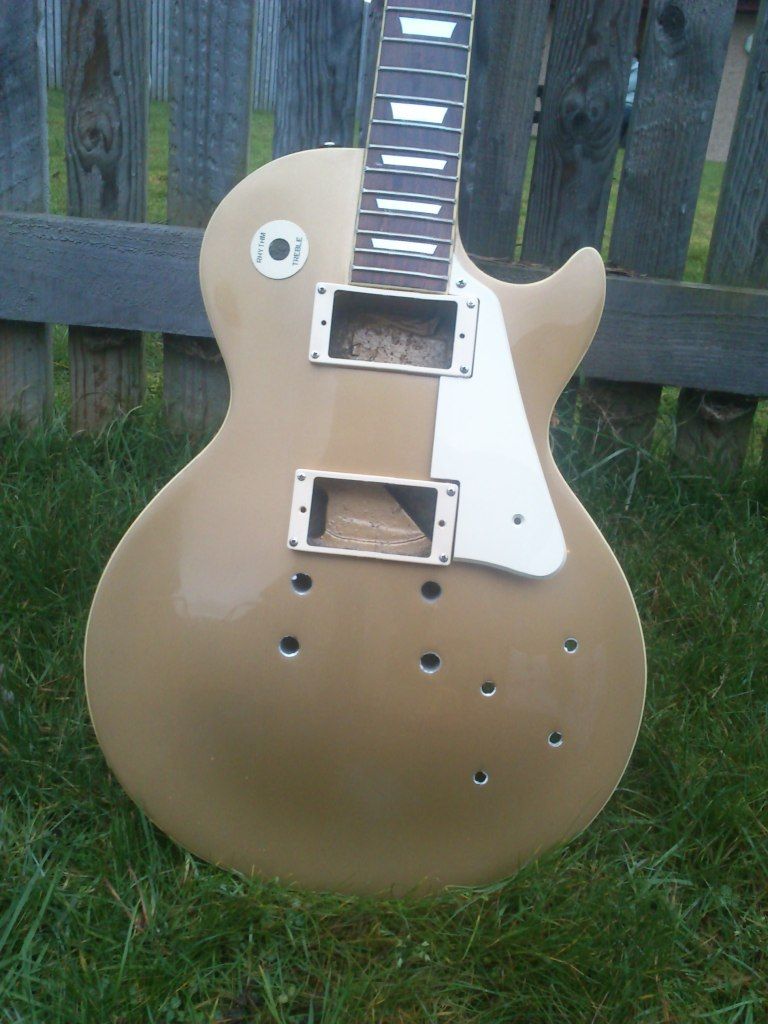

and here is a bone blank top nut ready to start shaping.

wet sanded the top with 1200 grit. Then I pulled off the tuners, the nut and TRC and wet sanded the whole guitar with 2000 grit. Next I popped off down to the shop where I got the paint and bought a mushroom shaped polishing pad and some gunge.
It is sort of a polishing paste but in stead of needing several different grades this one starts gritty, and the grit shrinks as you work it getting finer and finer and the idea is you stop once you have reached the desired level of shine.
so I gave the top a whirl until it was looking pretty shiny, did the back and sides to a satin/shiny finish, and left the neck and headstock matt/satin finish for a smooth feel when playing.
I finally started popping some of the parts I have collected together on just to see how it all looks.
my top is not perfect though,(I made another mistake). I had several different grades of sandpaper all out at once, and accidentally picked up a heavier grit when wet sanding the top, I thought I had fixed it with the finer grade but when you see it in the right light there are some marks and scratches visible...However, this is not a disaster, after seeing it with some parts on, the screws a little gnarled and the poker chip is scratched and the writing is starting to fade, as is the truss rod cover, also the machine heads are naturally aged and there are cracks in the original clear coat over the binding, so I think I might go for a mildly "distressed look".
and here is a bone blank top nut ready to start shaping.

Bigneil
Senior Member
- Joined
- Mar 8, 2011
- Messages
- 696
- Reaction score
- 614
You're doing a great job, Neil
I know I had not the nerves to do it
Thanks Peter, This has been a great learning experience for me. I wouldn't have set out to try something like this on a guitar that already had a usable finish on it. lol
Bigneil
Senior Member
- Joined
- Mar 8, 2011
- Messages
- 696
- Reaction score
- 614
update.
parts day.
got a nice shiny new bridge and tail piece too,....but it was too shiny so i fitted it to my other LP and installed the slightly tarnished "played in" one from the other guitar to the goldtop.

I have done a little fret work, oiled the fingerboard and started shaping the bone nut using the original plastic one as a rough template.


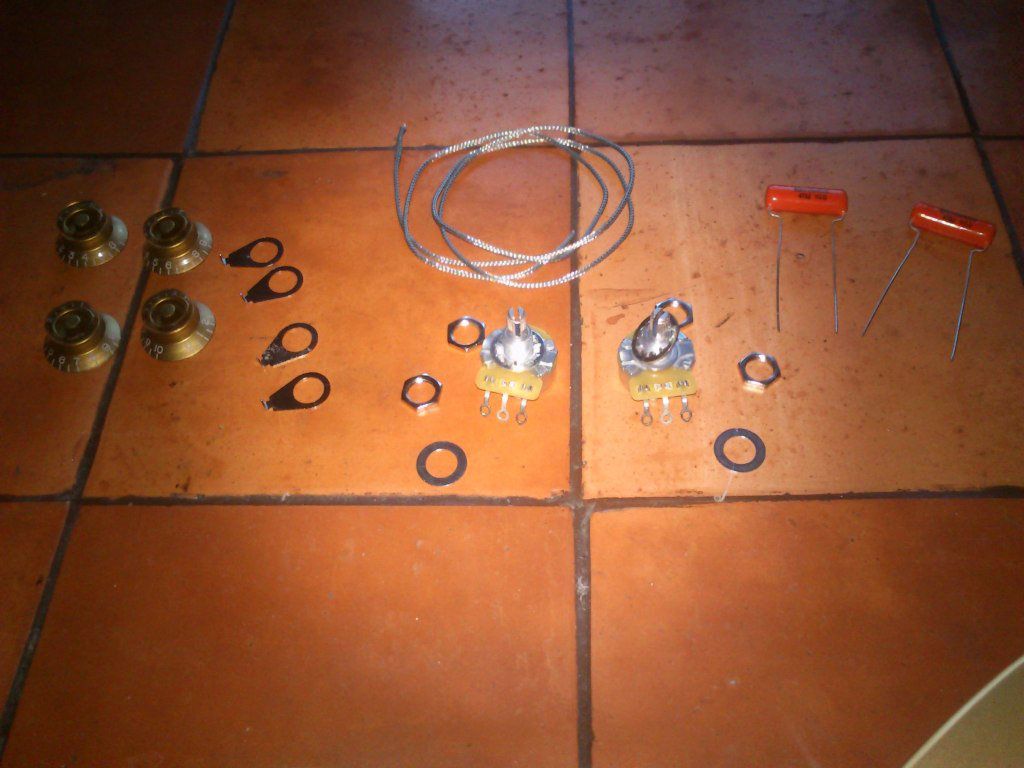
All I am waiting on now are some custom taper 550K CTS pots that I ordered from bareknuckle to use as volume controls and I can build up the harness (similar idea as RS superpots)
https://www.bareknucklepickups.co.u...page=product_info&cPath=24_71&products_id=201
just have to wait till next month before I can afford pickups....getting impatient now......I'm getting GAS for my own guitar LOL
parts day.
got a nice shiny new bridge and tail piece too,....but it was too shiny so i fitted it to my other LP and installed the slightly tarnished "played in" one from the other guitar to the goldtop.
I have done a little fret work, oiled the fingerboard and started shaping the bone nut using the original plastic one as a rough template.
All I am waiting on now are some custom taper 550K CTS pots that I ordered from bareknuckle to use as volume controls and I can build up the harness (similar idea as RS superpots)
https://www.bareknucklepickups.co.u...page=product_info&cPath=24_71&products_id=201
just have to wait till next month before I can afford pickups....getting impatient now......I'm getting GAS for my own guitar LOL
