How does one properly finish a lacquered maple fretboard?

  • Thread starter Skyjerk
  • Start date
  • This site may earn a commission from merchant affiliate links like Ebay, Amazon, and others.

Skyjerk

Sausages
Gold Supporting Member
Joined
Feb 8, 2014
Messages
7,668
Reaction score
10,906
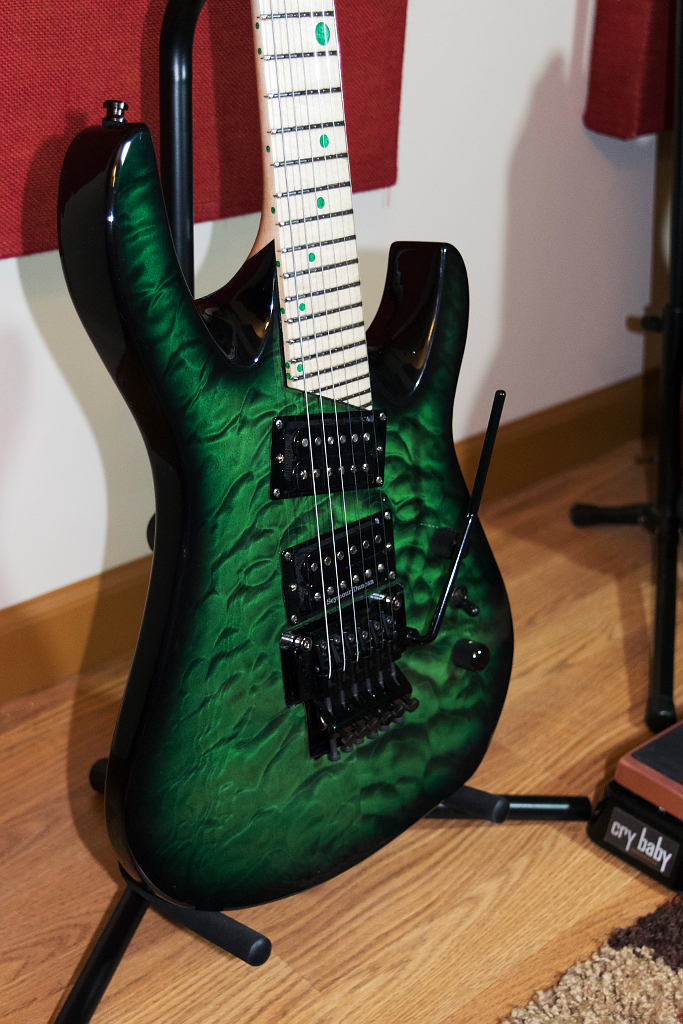
I've just done my first on the guitar I built for my buddy, but frankly I'm not at all satisfied with my result. Ive done ebony and rosewood, but this is my first maple.

I've had a certain amount of beginners luck but I think its wearing thin. I'm just not happy with how this board turned out and I cant seem to find any definitive tutorials on how to do one properly.

If any can help with the following questions I'd be very grateful :)

1. How much lacquer?

I read "2 or 3 coats" in a couple places, but is that coats like some describe as 3 wet passes 15 minutes apart = 1 coat, and do that 3 times, or is is more literal as in 3 wet passes and you are done?

2. Do you need to prepare or pre-treat the frets in any way so that the lacquer comes off more easily? In my case the lacquer seemed to become one with the frets, and was an absolute nightmare to remove. I tried scraping with razor and scalpel, 0000 steel wool, etc. This stuff would not come off. These were stainless BTW

3. How do you treat the fret ends so they dont look ugly? Do you try and undercut and fill, or just grind them flush and show the whole tang edge? Undercut and use maple binding to hide the ends?

4. How do you finish the fingerboard surface? Just the same as the rest of the neck?
 

Freddy G

V.I.P. Member
Joined
Mar 18, 2007
Messages
19,950
Reaction score
58,312
1. How much lacquer?

I read "2 or 3 coats" in a couple places, but is that coats like some describe as 3 wet passes 15 minutes apart = 1 coat, and do that 3 times, or is is more literal as in 3 wet passes and you are done?

If you are using nitro then I would do 3 coats as 3 wet passes 15 minutes apart = 1 coat. This is a playing surface, so you need some kind of build otherwise your fingers are going to wear through that finish in no time.....unles you want that look of course!

2. Do you need to prepare or pre-treat the frets in any way so that the lacquer comes off more easily? In my case the lacquer seemed to become one with the frets, and was an absolute nightmare to remove. I tried scraping with razor and scalpel, 0000 steel wool, etc. This stuff would not come off. These were stainless BTW

No pretreatment. You just level the frets afterwards, that takes off the lacquer on the fret top. As you continue with the fret dress, crowning file and finer grits of sandpaper you will end up with the lacquer just filleted at the corner where the fret bead meets the fretboard. I have also ground a scraper device out of the head of a large common nail and scraped the lacquer off. Yes, it's a PITA.

3. How do you treat the fret ends so they dont look ugly? Do you try and undercut and fill, or just grind them flush and show the whole tang edge? Undercut and use maple binding to hide the ends?

I guess it depends on what you mean by ugly. Just the tangs filed flush? Sure...that's the standard thing. I personally don't find that ugly at all but YMMV.

4. How do you finish the fingerboard surface? Just the same as the rest of the neck?

Yes, finishing is not the problem. It level sanding and buffing in between the frets that's the real PITA. PITA! there....I've used that acronym 3 times now. See the theme going on here? :cool::applause:

I've got a maple neck coming up in queu for finishing. I think this time I'm going to try finishing first and then installing the frets. That idea has always appealed to me for the sake of ease of finishing and polishing of the fretboard, but I've always been put off by the idea that the fret will sit on top of the lacquer. I've got some ideas this time around though....basically carefully scraping the finish from where the fret will be. Who knows which method will end up being more of a PITA! (there's #4 lol) :D
 

Skyjerk

Sausages
Gold Supporting Member
Joined
Feb 8, 2014
Messages
7,668
Reaction score
10,906
If you are using nitro then I would do 3 coats as 3 wet passes 15 minutes apart = 1 coat. This is a playing surface, so you need some kind of build otherwise your fingers are going to wear through that finish in no time.....unles you want that look of course!


No pretreatment. You just level the frets afterwards, that takes off the lacquer on the fret top. As you continue with the fret dress, crowning file and finer grits of sandpaper you will end up with the lacquer just filleted at the corner where the fret bead meets the fretboard. I have also ground a scraper device out of the head of a large common nail and scraped the lacquer off. Yes, it's a PITA.


I guess it depends on what you mean by ugly. Just the tangs filed flush? Sure...that's the standard thing. I personally don't find that ugly at all but YMMV.


Yes, finishing is not the problem. It level sanding and buffing in between the frets that's the real PITA. PITA! there....I've used that acronym 3 times now. See the theme going on here? :cool::applause:

I've got a maple neck coming up in queu for finishing. I think this time I'm going to try finishing first and then installing the frets. That idea has always appealed to me for the sake of ease of finishing and polishing of the fretboard, but I've always been put off by the idea that the fret will sit on top of the lacquer. I've got some ideas this time around though....basically carefully scraping the finish from where the fret will be. Who knows which method will end up being more of a PITA! (there's #4 lol) :D

Thanks Freddy. Thats good information. Particularly the knowledge that its not just me, but that it is actually a big PITA :)

I'll be very interested to hear how your experiment turns out!
 

rusdfh

Senior Member
Joined
Jan 29, 2013
Messages
152
Reaction score
117
Thanks for asking thanks for the reply, I've been looking at a junk three screw fender neck for quite a while now thinking maybe I would just plane it and make it a rosewood board. with this encouragement believe that will become plan B
 

emoney

Senior Member
Joined
Jan 31, 2010
Messages
7,578
Reaction score
3,974
Why could you spray first, then use your triangle file to "prepare the fret slots", as usual.
Wouldn't that remove the lacquer where the fret is going to be seated?

Just throwing that out there as a thought, because I can't offer much in the way of advice,
but I do have a Maple Fretboard of my own in the coming months to worry about, and that
idea has been roiling around in my head for a bit.
 

Freddy G

V.I.P. Member
Joined
Mar 18, 2007
Messages
19,950
Reaction score
58,312
Why could you spray first, then use your triangle file to "prepare the fret slots", as usual.
Wouldn't that remove the lacquer where the fret is going to be seated?

Yes, that's my basic plan. But I want it to be accurate, so that I remove the lacquer only up to the very edge of the fret bead and no further. It might prove to be a lot easier than I anticipate....
 

Skyjerk

Sausages
Gold Supporting Member
Joined
Feb 8, 2014
Messages
7,668
Reaction score
10,906
Would it be ridiculous to apply a strip of tape the same width as the fret over the slot before shooting, shoot it, and then remove the strips while the lacquer is still slightly soft, then sand and buff as usual when fully hard?
 

Freddy G

V.I.P. Member
Joined
Mar 18, 2007
Messages
19,950
Reaction score
58,312
I THINK THE ISSUE WITH THAT WOULD BE THE RIDGE IT WOULD LEAVE. Ugghh, sorry....caps lock....to lazy to redo it!

Also I think I'd rather sand and buff when the lacquer was unbroken ( OK by the fret slots only), and then remove the unwanted lacquer where the fret seats afterwards.

Ooh! I just had an idea. Maybe build some kind of little scraper to the exact width of the fret bead, but that has a little rudder that sticks down into the fret slot so it stays perfectly centered.


Yeah! I like it!
 

Baylin

Senior Member
Joined
Feb 16, 2014
Messages
1,150
Reaction score
848
I THINK THE ISSUE WITH THAT WOULD BE THE RIDGE IT WOULD LEAVE. Ugghh, sorry....caps lock....to lazy to redo it!

Also I think I'd rather sand and buff when the lacquer was unbroken ( OK by the fret slots only), and then remove the unwanted lacquer where the fret seats afterwards.

Ooh! I just had an idea. Maybe build some kind of little scraper to the exact width of the fret bead, but that has a little rudder that sticks down into the fret slot so it stays perfectly centered.


Yeah! I like it!

Would using some fret wire with the tang removed and then been abraided under the fret with a dremel work for that?
 

Skyjerk

Sausages
Gold Supporting Member
Joined
Feb 8, 2014
Messages
7,668
Reaction score
10,906
How would the fretboard spraying process differ if you were using a 2K urethane?

Being something of a perfectionist, and there being several things that turned out less than perfect on that build, I decided I'm going to build another guitar for my friend and keep
the "flawed" one for myself.

One thing he wanted was a satin finish on the neck. Freddy, we discussed that in a PM and you mentioned 2K urethane as a good option.

Would this product work and/or wear well on the fretboard itself?
 

Freddy G

V.I.P. Member
Joined
Mar 18, 2007
Messages
19,950
Reaction score
58,312
How would the fretboard spraying process differ if you were using a 2K urethane?

Being something of a perfectionist, and there being several things that turned out less than perfect on that build, I decided I'm going to build another guitar for my friend and keep
the "flawed" one for myself.

One thing he wanted was a satin finish on the neck. Freddy, we discussed that in a PM and you mentioned 2K urethane as a good option.

Would this product work and/or wear well on the fretboard itself?


Yes, the 2k satin wears very well!

edit:

To answer your first question....spraying any kind of satin on the fretboard is so much easier because you don't have to level and buff! Sure, you have to do a light wet sand after the first coat (if using 2K, if using nitro build a few coats before wetsanding)
 

Skyjerk

Sausages
Gold Supporting Member
Joined
Feb 8, 2014
Messages
7,668
Reaction score
10,906
Yes, the 2k satin wears very well!

edit:

To answer your first question....spraying any kind of satin on the fretboard is so much easier because you don't have to level and buff! Sure, you have to do a light wet sand after the first coat (if using 2K, if using nitro build a few coats before wetsanding)

Awesome :)

OK last question. What are you wearing?

oh wait, thats not what I wanted to ask...:D

Actually, I do have one more. These questions all apply to a neck-through that should ultimately look similar (if not identical) to my last build shown below. As I mentioned, there are some issues I have with this one and I want to start from scratch and do a better job.

Obviously I have to either go with nitro or 2K since the neck and body are one piece
So I guess the question is, can I dye the 2K or is that stuff just clear and solid colors?

burrito107.jpg
 

Freddy G

V.I.P. Member
Joined
Mar 18, 2007
Messages
19,950
Reaction score
58,312
Oh sure you can dye 2k clear


and BTW, I'm wearing a Kenora dinner jacket right now :D
 

LtDave32

Let Desert Star be your next guitar!
Super Mod
Silver Supporting Member
V.I.P. Member
Joined
Mar 19, 2010
Messages
68,455
Reaction score
254,069
Chris, at first I was concerned about spraying over the frets when doing a maple board, but since I level and re-crown every job, it became a non-issue. Working the frets, especially the re-crown takes all the lacquer off.

The ones I build for people have a very thin finish, for everybody in my camp wants to get that worn-through look, and pronto.

At first I was worried about a thick lacquer build-up on the sides and bases of the frets (like a Rickenbacker) but that didn't happen.
 

B. Howard

Senior Member
Joined
Apr 19, 2014
Messages
697
Reaction score
627
I prefer to spray over the frets.

I did one where I sprayed first and then fretted and it was a bigger PITA than working over the frets. The fret slots got tight and the finish a bit chippy when installing frets. Then there was dealing with filling in all the small gaps under the fret tangs in the slots after fretting.....the time spent filling and touching up and re-buffing a brand new finish was considerable.

On new work I level, crown and polish frets after finishing so the lacquer (or poly) gets removed. on re-finishes where I will not be doing any fret work I tape off the crown of each fret with 1/8" masking tape and leave it in place until after it is buffed. The buffer will peel off most of the tape but I don't like getting any more of that black metal contamination on my buffing wheels than absolutely necessary.
 

Freddy G

V.I.P. Member
Joined
Mar 18, 2007
Messages
19,950
Reaction score
58,312
I prefer to spray over the frets.

I did one where I sprayed first and then fretted and it was a bigger PITA than working over the frets. The fret slots got tight and the finish a bit chippy when installing frets. Then there was dealing with filling in all the small gaps under the fret tangs in the slots after fretting.....the time spent filling and touching up and re-buffing a brand new finish was considerable.

On new work I level, crown and polish frets after finishing so the lacquer (or poly) gets removed. on re-finishes where I will not be doing any fret work I tape off the crown of each fret with 1/8" masking tape and leave it in place until after it is buffed. The buffer will peel off most of the tape but I don't like getting any more of that black metal contamination on my buffing wheels than absolutely necessary.

Good info about the black metal contamination on the buffing wheel. Yeah I hate that too....which is why when buffing I'll always do it before the lacquer on the frets gets removed.

Here's an interesting read I found from luthier Phil Jacoby:

Philtone Guitar Company - Fretting Finished and Maple Guitar and Bass Necks
 

Latest Threads


Top
')